


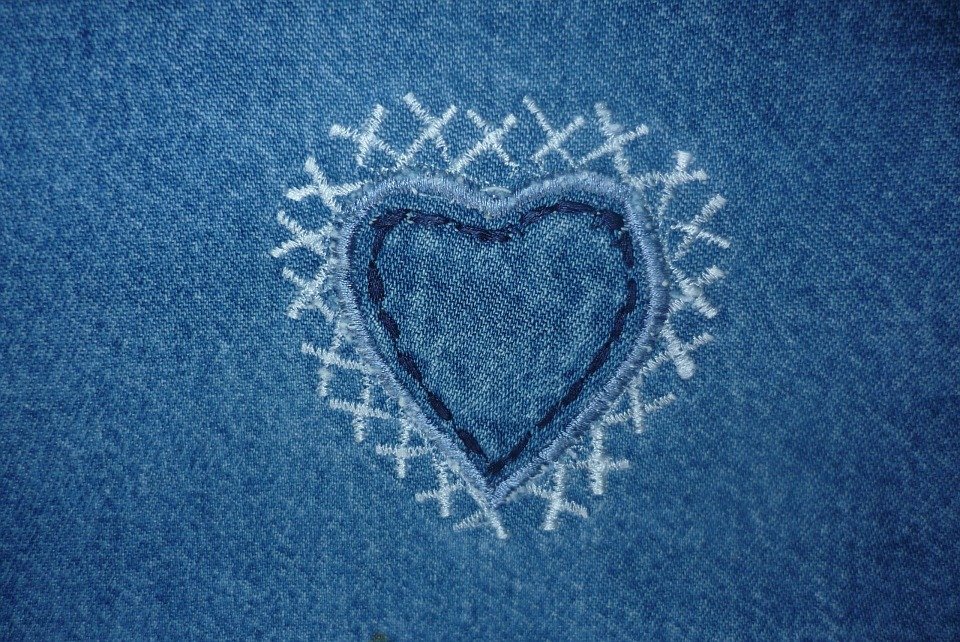
How to Design and Customize Embroidered Patches

According to a study done by the American Apparel and Footwear Association, the average American owns 30 pieces of clothes. While most people don’t think twice about their clothes, some take great pride in their appearance and want their clothes to reflect their unique personality. For these people, plainclothes just won’t do. They want their clothes to make a statement, and one way to do that is by customizing them with embroidered patches.
Embroidered patches are a great way to promote your brand or show support for a cause. They can be attached to clothing, bags, or other fabric items and are easily customizable. You can design your own patch using an online tool or order them from a professional manufacturer.
Here are some tips on how to design and customize your own embroidered patches:
Choose The Right Size For Your Patch
The size of your patch will depend on the item it will be attached to and the amount of space you have to work with. You might want a larger patch if you’re attaching a patch to a bag or jacket. But if you’re attaching it to a shirt, you’ll probably want a smaller patch. You also need to consider the “embroidery percentage” of your design to achieve optimum cost and best results. The embroidery percentage is the amount of stitching in your design compared to the size of the patch.
Select The Right Fabric For Your Patch
The type of fabric you choose for your patch will also affect the cost and quality of your final product. There are three main types of fabric used for patches: twill, felt, and leather. Twill is the most popular fabric for patches because it’s durable and has a tight weave that prevents fraying. It’s also the most expensive fabric.
Decide On The Color Of Your Patch
The color of your patch is important for two reasons: it needs to match the item it will be attached to, and it needs to be visible. If your patch is going on a black bag, you might want to choose a light-colored thread so that your design will be visible.
Choose The Right Kind Of Thread For Your Patch
The type of thread you choose for your patch will affect your final product. There are two main types of thread: polyester and rayon. Polyester is the cheaper of the two options, but it’s not as durable as rayon. It’s also not as easy to work with, so it’s not recommended for complex designs.
Rayon is more expensive than polyester, but it’s more durable and easier to work with. It’s the best option for complex designs or patches that will be subject to wear and tear.
Select The Right Backing For Your Patch
The backing of your patch will hold it in place on your clothing or other fabric items. There are two main types of backing: iron-on and sew-on. Iron-on backing is the cheaper and easier option, but it’s not as durable as sew-on backing.
Design Your Patch
Once you’ve decided on your patch size, fabric, color, thread, and backing, you’re ready to design it. If you’re not sure where to start, there are a few things you can do to get inspired:
- Look for patch designs online. There are a lot of great resources for finding patch designs, including Pinterest and Google Images.
- Check out patch design books or magazines.
- Talk to people who wear patches. They might have some great ideas for you.
Once you have some ideas, you need to start creating your design. If you’re not a skilled artist, don’t worry – there are a few ways you can make your design look great, even if you’re not an expert.
- Use a software program like Adobe Illustrator or Photoshop to create your design.
- Find a designer who can create a custom design for you.
- Use an online template.
Send Your Design To A Professional Embroiderer
Once you’ve created your design, it’s time to send it to a professional embroiderer. They will take your design and turn it into a beautiful patch that you’ll be proud to wear. When choosing an embroidered one, it’s important to find one that has experience creating patches.
A great way to find a reputable embroiderer is to ask people who wear patches where they had their patches made.
Attach Your Patch To Your Clothing
Once you’ve received your patch from the embroidered attachment, it’s time to put it on your clothing. If you’re using an iron-on backing, all you need to do is follow the instructions that came with the patch. If you’re using a sew-on backing, you’ll need to stitch the patch onto your clothing. You can do this by hand or with a sewing machine.
Now that you’ve followed all of these steps, you should have a beautiful patch that you’re proud to wear. Enjoy showing it off to your friends and family! However, don’t forget to take care of it to last for years to come. Be sure to read the care instructions that came with your patch. With proper care, your patch will last for years to come. Thanks for reading!


No comments